Recently I’ve bought a new bicycle head lamp from FastTech. I’ve ordered a Black FandyFire X2 with european charger plug that use two CREE XM-L U2 high power LEDs. The lamp was about 40$ with free shipping word wide.

You can notice that in fact there is a SolarStorm X2 logo on the lamp and not the FandyFire, buy it seems like there are no differences except the logo on the top.

I’ve done some test of the lamp and the battery, you can find results below.
- Battery
There is a 8,4V 2S2P battery included (4 x 18650 Lipo batteries). Battery is wrapped with thermal shrink collar with cardboard top and bottom – it’s not water resistant. The cable length is 43 cm and the plug type is 5.5/2,1mm. Battery came almost fully charged. I’ve connected it for a 1 minute to the lamp to check if everything works as it should and then connected the charger. The first charge took less than 30 minutes.

I’ve done some simple capacity test using my Turnigy Accucell 6. The battery voltage right after the PD-05 charger indicate battery full was 8,24V (cheap 5$ multimeter). I used discharge current ≈ 700 - 800mA (max what Accucell can do) and the voltage dropped to 7,5V immediately after discharge process starts. After 500mAh the battery voltage was 7,18V.
7V at 788mAh.
6,9V at 1000mAh.
6,55V at 1500mAh.
6,43V at 2000mAh
and 6,38V at 2400mAh

Last phase of discharge was done with smaller current – 0,3A.
I could drain additional 1200mAh until the voltage dropped to 6V.

The total measured capacity was 3600 mAh (0,7-,8A discharge current + 0,3A discharge to 6V).

When I was playing with the battery I’ve managed to short circuit it by accident. It seems like the cells has protection circuits - after that the voltage output from the battery was null - 0V. Connection to the charger for a minute or so activates the normal operation mode of the battery.

Then I used Accucell 6 to charge the battery fully with max current just 0,5A. It took almost 600minuts and the battery accepted 3794mAh. Charging chart below.

The battery holster is cheap, could be better - but it does what it should.


- Charger
The charger is a PD-05 type with output 8,4V and 1A (that's what the label says). The plug type is a 5,5/2,1mm.

The charger has some small LED that seems to have following functions (base on my observations):
· When you turn the charger on without battery connected – the LED is sold GREEN.
· When you connect the battery the LED turns to solid RED.
· During first phase of charging the LED is constantly/solid RED,
· During last phase of the charging process (last 15-20 minutes) LED is RED with some short GREEN blinks.
· When the battery is fully charge the LED switches to solid GREEN.

As I wrote earlier the battery voltage right after charging process finished was 8,26V.
The voltage at the charger output without load is 8,46V.
Charger cable length is 1,15m.
It probably can charge a battery but I don’t expect miracles from it.
- Lamp
The lamp looks really nice, like a quality product. It’s quite small and compact. The switch button has short travel and it feels good. Lamp cable length is 48cm.

I tried to measure current draw for various lighting modes and this are the results (please notice that I’ve got only a cheap meter, and I was using additional 1,5m long cable to measure the current, so that caused additional voltage drop, nonetheless it gives some rough idea). This is the current that goes from the battery to the lamp body and not directly to the LED!
UPDATE 21 September 2013:
I've measured currents again using professional current shunt and high discharge Turnigy Nano-Tech battery.
standby mode: 20mA
low: 0,5A
medium: 1,4A
high: 2,5ASimple theoretical calculation show that lamp should be working on fully charged battery for about:
up to 1h 20min on high mode,
up to 2h 20min on medium
and up to 6h 40min on low.
up to 2h 20min on medium
and up to 6h 40min on low.
(nonetheless this are rough approximation, calculation are simplified as much as possible).
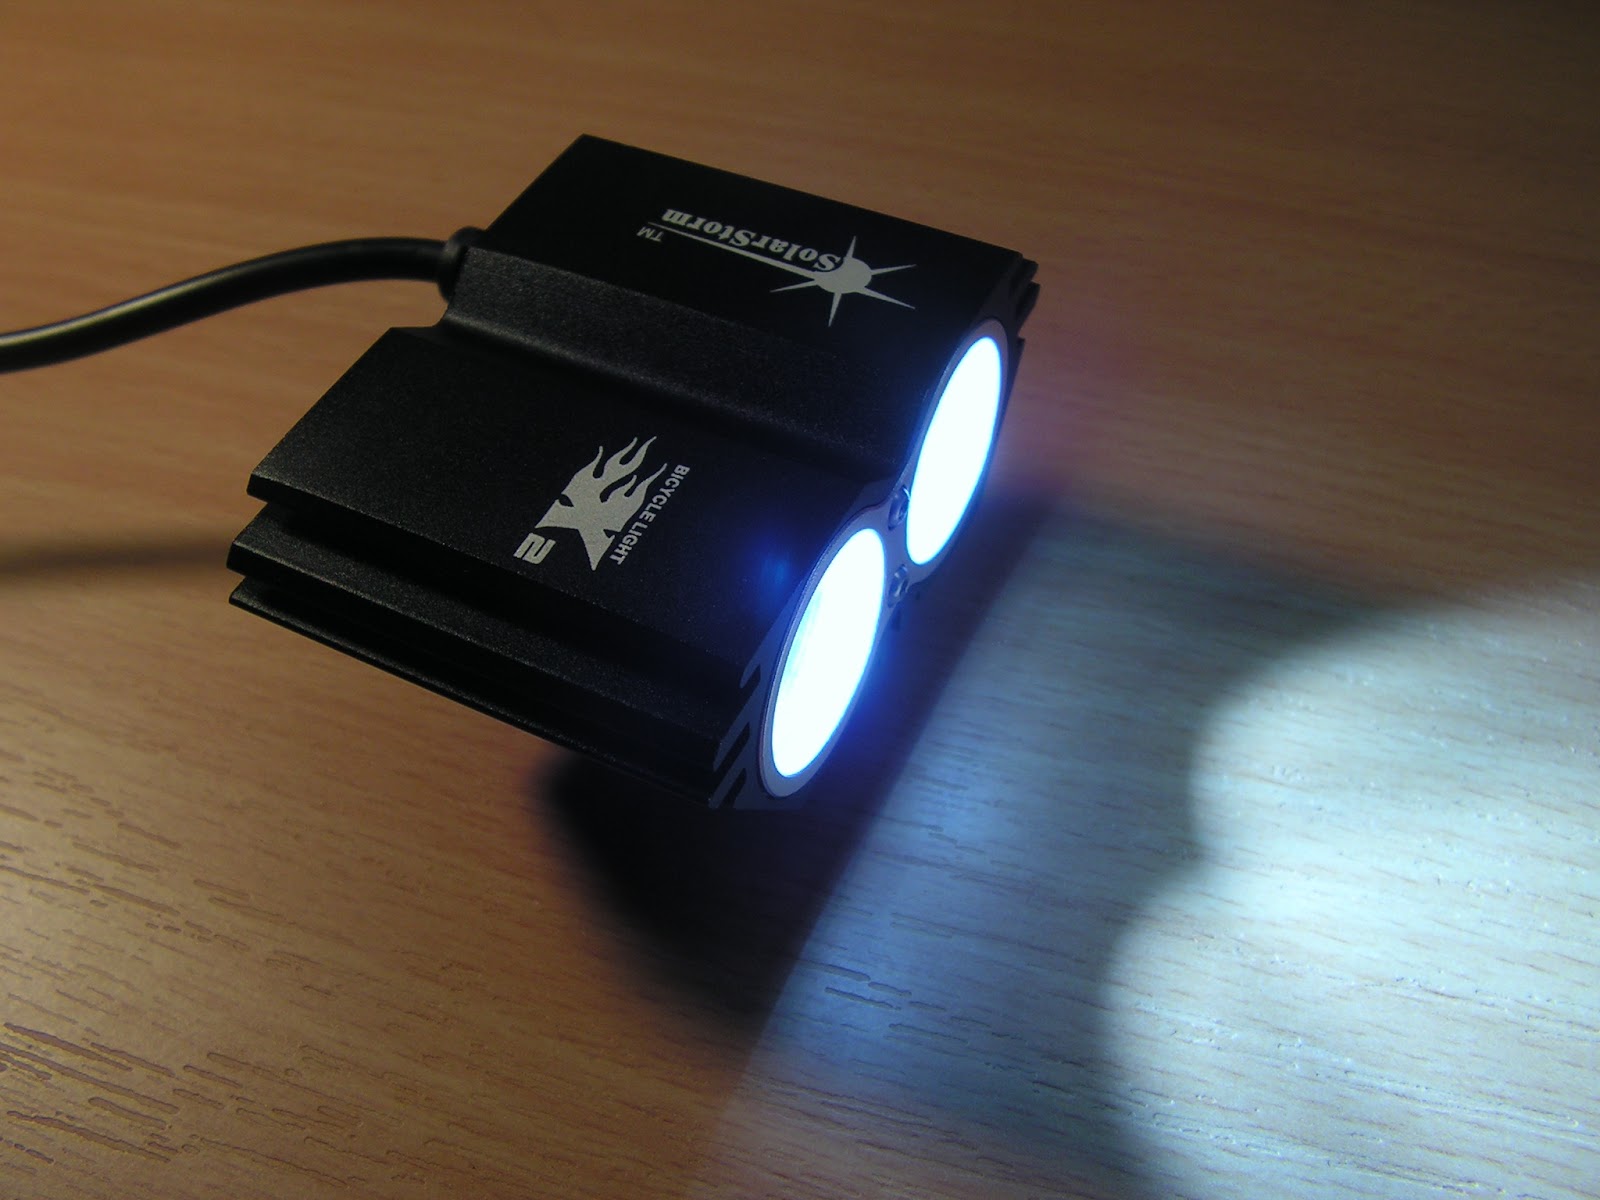
The beam is correct as for a bicycle light, there is a spot area that lights the path and there is also flood light that lights the sides of the road. When riding fast on a moderate terrain the beam power is enough even on the medium setting. The High setting is perfect. Low setting is very good for a slow ride or just a cruising along. If you are not sure about the beam shape, all I can say - for me it’s really good. The only downside is that the insight area of a really tight turns will be dark, but it’ll be dark with most of bicycle lights. For crazy fast curvy single track night rides you’ll need also an additional light on your helmet, this is only needed on tight corners and curves. I don't think this lamp can be used on public roads - it would blind all drivers. It gets hot when operated on the HIGH setting.The light colour is cold white, only slightly bluish at the edges.
- Conclusion
It looks great, the quality of the lamp body is extraordinary. The light beam is very strong and has correct shape. It's unbelievably cheap. And you get a complete set.
Just don't forget to wrap your battery to protect it from water. Ciao.
UPDATE: 21 September 2013
Today I wanted to add a balancer lead to the battery to allow “more advanced” charging. I was expecting to see a two sets of two serial batteries connected in parallel with two leads for power / charging. I’ve opened the shrink collar covering the battery and this is what I get:


First of all, there is an additional PCB board on the side of the battery, second of all this board connects power leads and something what looks like an internal balancer lead - very interesting. Unfortunately when I was trying to check what the PCB is exactly one of the leads come apart from the cell, so I decided not to dig further. For now I’ve decided to stay with battery setup as it is originally.
(I've been playing with regulated voltage source).
3LED solid: battery voltage >= 7,3V
2LED solid: 7,2V >= battery voltage >= 6,9V
1LED solid: 6,8V >= battery voltage >= 6,1V
1LED blinking : battery voltage <= 6V
Indicator has a latch, when voltage drops below threshold it does not allow to show again higher voltage unless you disconnect the battery completley.
- Battery level indicator
(I've been playing with regulated voltage source).
3LED solid: battery voltage >= 7,3V
2LED solid: 7,2V >= battery voltage >= 6,9V
1LED solid: 6,8V >= battery voltage >= 6,1V
1LED blinking : battery voltage <= 6V
Indicator has a latch, when voltage drops below threshold it does not allow to show again higher voltage unless you disconnect the battery completley.


